Easy Gluten-Free White Bread: Your Bread Machine Recipe Guide
There’s nothing quite like the aroma and taste of freshly baked bread. For those following a gluten-free diet, this simple pleasure often feels out of reach, with store-bought options sometimes lacking the comforting texture and flavor of traditional loaves. However, thanks to the marvel of modern kitchen appliances, achieving a warm, homemade loaf of gluten free white bread is not only possible but incredibly easy with a bread machine. This guide will walk you through crafting a delicious, tender loaf that will make you forget about gluten entirely.Why Your Bread Machine is a Game-Changer for Gluten-Free Baking
A bread machine isn't just a convenience; it's an indispensable tool for gluten-free baking. Unlike traditional wheat-based doughs that rely on gluten for structure and elasticity, gluten-free doughs require precise ratios and often benefit from specific mixing and rising conditions. This is where your bread machine shines. * Effortless Convenience: Forget about kneading, proving, and constant supervision. The bread machine handles all the hard work, from mixing and kneading to rising and baking, freeing up your time for other tasks. This is especially beneficial for busy individuals who crave fresh bread but lack the time for intensive baking. * Consistent Results: Bread machines provide a controlled environment for baking. The consistent temperature during the rise cycles and the precise baking times help ensure a more uniform loaf every time, reducing the guesswork often associated with gluten-free baking. * Freshness on Demand: Imagine waking up to the smell of freshly baked bread! With a bread machine, you can program it to have a warm loaf ready whenever you desire, offering a significant improvement over often dry or crumbly pre-packaged alternatives. * Control Over Ingredients: Making your own bread gives you complete control over what goes into it, avoiding unwanted additives, preservatives, or cross-contamination that can sometimes be found in commercial products. While you might find that bread machine gluten-free loaves tend to have a slightly denser texture compared to some oven-baked counterparts, modern recipes and proper techniques can significantly improve this. Understanding the role of each ingredient and following specific instructions is key to achieving a truly satisfying result.Crafting the Perfect Gluten-Free Flour Blend for White Bread
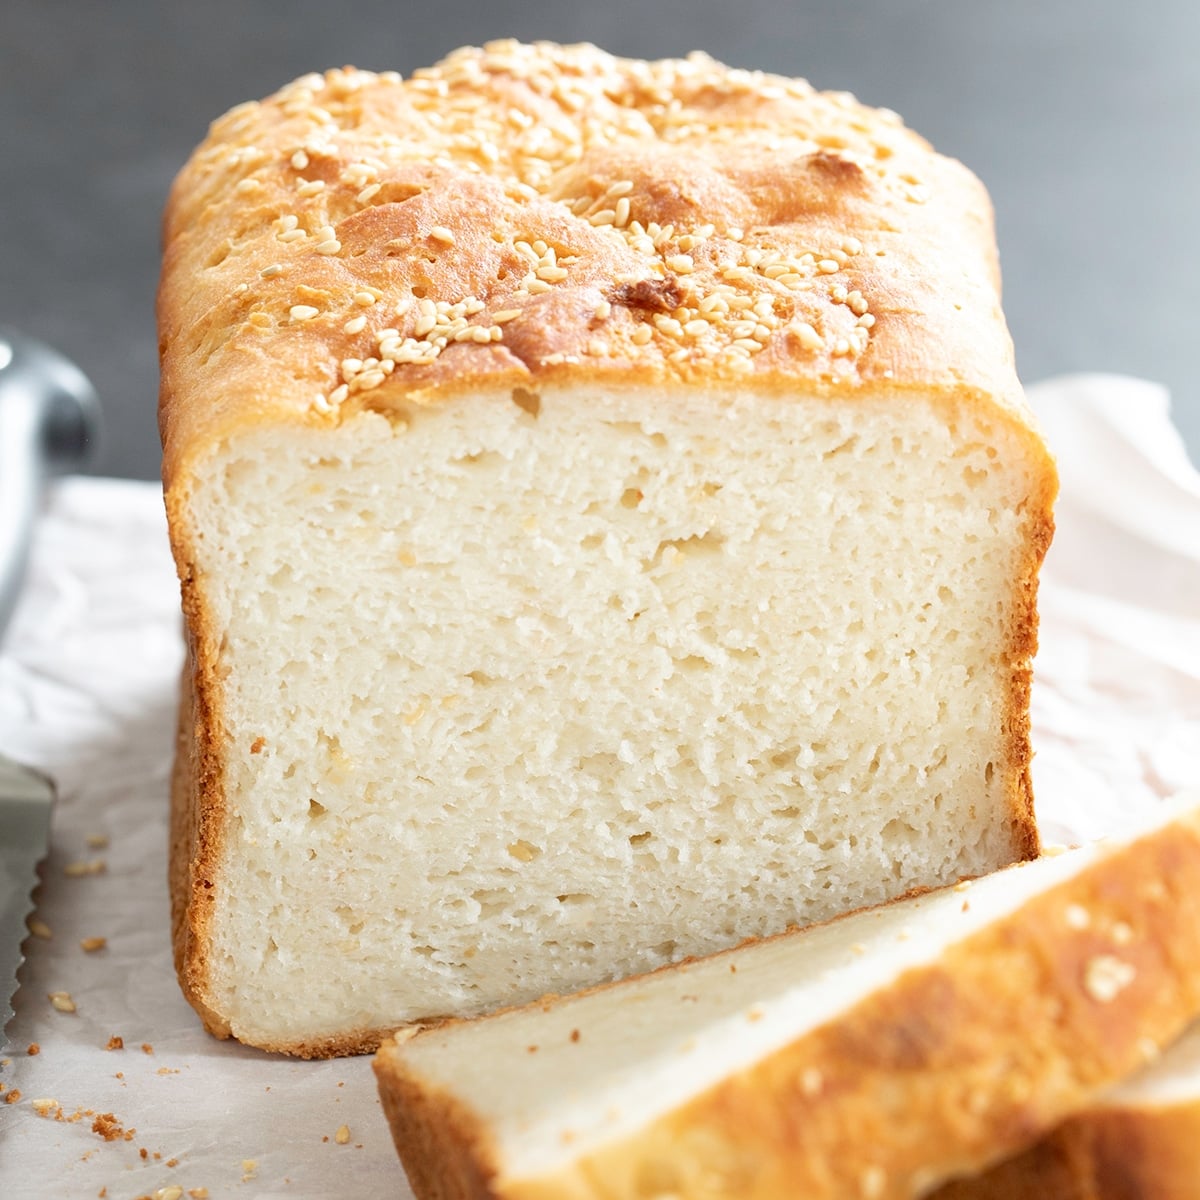
The foundation of any great gluten-free bread is its flour blend. Since gluten is absent, a combination of flours and starches is necessary to mimic its structural and textural properties. For a light and airy gluten free white bread, specific components work together: * White Rice Flour: This forms the bulk of our flour blend, providing a neutral flavor and light texture. It's a common base for many gluten-free recipes. * Potato Starch: A crucial ingredient for tenderness and moisture. Potato starch helps create a soft crumb and prevents the bread from becoming too dry or crumbly. * Tapioca Starch (or Tapioca Flour): Known for its ability to add chewiness and a slight crispness to crusts. It contributes to the bread's elasticity, a quality often missing in gluten-free baking. * Xanthan Gum: This is arguably the most vital ingredient in gluten-free baking. Acting as a binder and emulsifier, xanthan gum replaces the elasticity and stickiness that gluten provides. It helps trap gases released by the yeast, allowing the bread to rise and giving it a more conventional structure, preventing crumbling. Without it, your bread would likely fall apart. By combining these elements, we create a balanced blend that provides structure, tenderness, and elasticity, moving closer to the familiar texture of traditional white bread. For a deeper dive into how different flours and starches interact to create optimal texture, explore our article on Achieving Ideal Texture: Gluten-Free White Bread with a Bread Machine.Your Easy Gluten-Free White Bread Machine Recipe
This recipe is designed for a 2.0 lb bread machine cycle, typically using a "Quick" or "Rapid Rise" setting.Ingredients:
Dry Ingredients: * 2 ½ cups white rice flour * 1 cup potato starch * ½ cup tapioca starch * 4 tablespoons granulated sugar * 1 ⅔ teaspoons salt * 1 tablespoon xanthan gum * 2 ⅔ teaspoons instant yeast Wet Ingredients: * 1 ⅓ cups warm milk (around 105-115°F / 40-46°C) * 4 large eggs, at room temperature * ⅓ cup olive oilInstructions:
- Prepare Dry Blend: In a large mixing bowl, combine the white rice flour, potato starch, tapioca starch, granulated sugar, salt, xanthan gum, and instant yeast. Whisk them together thoroughly to ensure all ingredients are evenly distributed. This step is crucial for consistent texture and rise.
- Load the Bread Pan: Following your bread machine manufacturer's recommendations, add the liquid ingredients first. Pour the warm milk into the bread pan, followed by the room-temperature eggs.
- Add Dry Ingredients: Carefully spoon the pre-mixed dry ingredients over the wet ingredients in the bread pan, creating a mound. Make sure the yeast doesn't directly touch the salt or sugar at this stage, as it can inhibit its activation.
- Initiate Cycle: Place the bread pan into your bread machine. Select the "Quick" cycle (sometimes labeled "Rapid Rise" or "Express Bake") for a 2.0 lb loaf. This shorter cycle is often preferred for gluten-free breads as they don't require the extended rise times of traditional loaves. Press start.
- Incorporate Olive Oil: Pay attention to your bread machine during the initial mixing phase. Once the ingredients have come together into a shaggy dough, use a rubber spatula to gently scrape down any flour clinging to the sides of the pan. At this point, add the olive oil to the mixture. This delayed addition of fat can sometimes contribute to a softer crumb.
- Paddle Removal (Optional but Recommended): Once the kneading cycle has finished (often signaled by a beep or a change in machine sound), you may carefully remove the kneading paddles from the dough. This prevents holes in the bottom of your loaf when sliced. If you do this, gently smooth the surface of the dough with a wet spatula to create a more even top.
- Bake and Cool: Allow the bread machine to complete its cycle. Once the bread is done, *immediately* remove the bread pan from the machine. Carefully invert the pan to release the hot loaf onto a wire cooling rack.
- Cool Completely: Let the bread cool on the wire rack for at least 30 minutes (ideally longer, up to an hour) before slicing. Slicing hot gluten-free bread can lead to a gummy texture and make it fall apart. Cooling allows the internal structure to set properly.
This bread is best enjoyed fresh, especially warm from the machine with your favorite spread!
